How To Use A Trail Camera To Rescue A Cat
Losing a beloved pet can be an incredibly distressing experience, but modern technology can significantly aid in the search and rescue process. Wildlife trail cameras are not just for hunting; they can also help find escaped indoor-only cats or observe cat colony behaviors. Cameras can help identify cats in the area and monitor their patterns. In this article, we’ll walk you through all the necessary equipment and how to use a trail camera to rescue a cat.
Make Your Plan
Scout the Area: Before setting up the trail cameras, it’s crucial to scout the area where your cat was last seen. Familiarize yourself with the surroundings, including hiding spots and potential hazards. Cats often seek shelter in bushes, under decks, or by dumpsters and garbage cans. By understanding the terrain, you can identify optimal locations for placing the cameras.
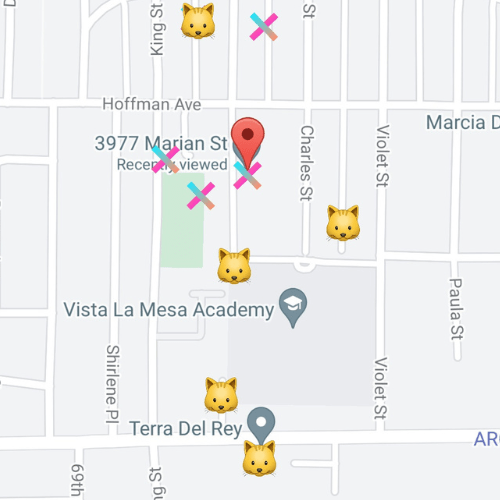
Create a Search Map: Create a map of the area you intend to search and mark the locations where you’ll place the trail cameras. Ideally, you would also create feeding stations to lure the cats to the cameras. Remember that areas with signs of wildlife activity or other community cat colonies are likely spots for your cat.
Plan to Expand Your Search Radius: Cats are known to roam considerable distances when lost. While starting your search in the vicinity of your home, it is essential to be prepared to expand your search radius gradually. Cats can cover several miles, especially if they feel threatened or disoriented. Plan your search strategy to cover a larger area as time goes on.
Take note of the community cats and feral cats, which can be a lead to finding lost pets.

Camera Equipment List
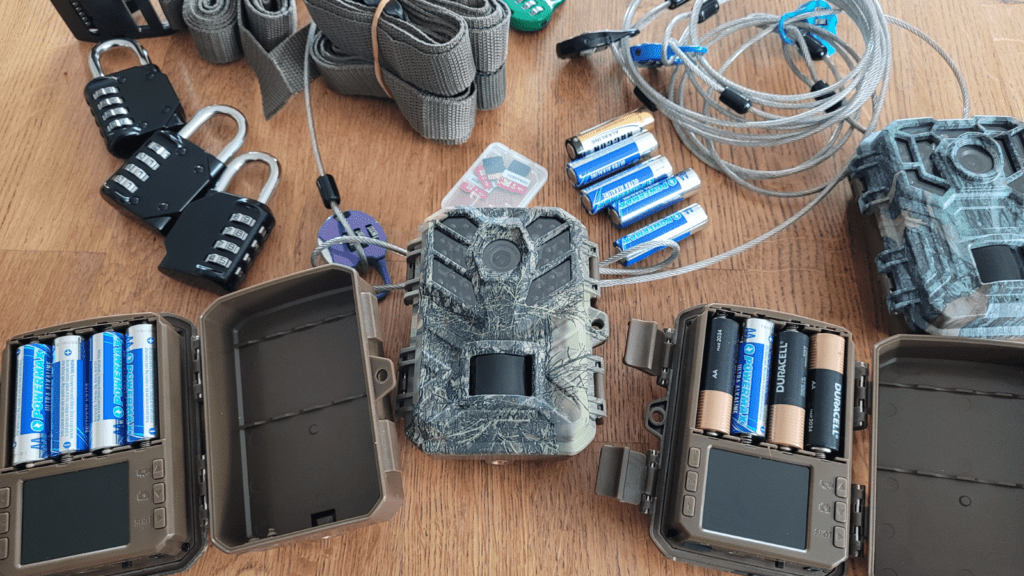
Once you have an idea of your rescue plan, it’s time to gear up. All these helpful items can be found on Amazon.com, and here is our recommendation for the Best Trail Cameras for TNR and Cat Rescue. Here are a few other recommendations for TNR equipment and gear.
- At least one camera per feeding station
- Strap or mount to secure the camera to a post or tree
- Lock and chain to prevent the cameras from being stolen
- Memory card: two memory cards per camera are ideal so that you can change them on the spot
- Memory card reader so you can upload the footage to your phone or computer
- Rechargeable Batteries: most cameras take 4-8 AA batteries and will last about 48 hours
Equipment Check And Prep
A good equipment check before you go into the field is a good idea. You may be in public areas or neighborhoods and want to get in and out quickly. Having your gear ready to go will ensure you can install the cameras quickly without witnesses. While there is nothing wrong with using a camera, people may take the camera or question you if they see you installing it.
- Format the memory SD card: Start with a clean slate by formatting the memory card to avoid any potential issues with recording. You have to do this before the memory card’s first use.
- Change settings to video: Set the camera to record videos, as they provide more information than just images.
- Test the camera: Make sure the camera works, including the night motion-sensitive recording.
- Check the battery power: Replace or recharge the batteries as needed to avoid downtime during the search.
- Familiarize yourself with the other camera options and features that might come in handy. Some live webcams can connect to wifi from your house or mobile hotspot.
How to Place a Trail Camera
Proper installation of trail cameras is crucial to capturing valuable footage. Placing trail cams correctly will also help conserve battery life by reducing continuous recording from wind or constant movement.
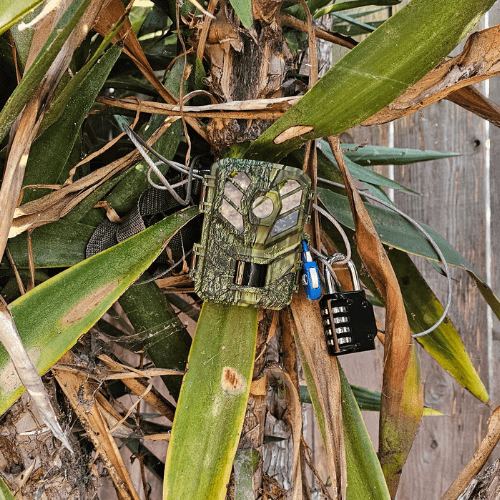
- Place under a tree or in camouflage: Conceal the camera to avoid detection by humans or potential threats.
- Place close to the food dish: Position the camera facing the cat food as close to the food dish as you can (1-3 feet is recommended)
- Strap and lock it tight: Securely fasten the camera to prevent it from being dislodged or stolen.

Set Up Tips
- Video settings: Use the highest video resolution available to capture precise details.
- Reduce brush and wind motion: Trim any vegetation that might trigger the camera unnecessarily, and choose a location less prone to solid wind movement.
- Track and map your progress: Keep a record of the camera locations and the areas you’ve covered to avoid overlap and ensure efficient search progress.
- Set passcodes to your camera: Protect the camera’s footage from unauthorized access by setting a password.

Optimize the camera settings to increase the chances of capturing relevant footage.
Monitoring Trail Cameras


Regular monitoring and review of your cameras are essential to finding your cat. Remember, cats are diurnal and are likely to be most active early in the morning or late at night. If you are actively searching or trapping cats, be prepared to be out of bed and sitting in your car between 3 am and 8 am. Trail cameras can help you identify when most of the animals are active.
- Review daily or every 48 hours to check the battery: Check the camera’s battery life and replace it with new battery packs if necessary.
- Track the untipped cats for future TNR or rescue: Record any other cats or wildlife sightings to aid in forthcoming recovery or trap-neuter-return efforts.
- What you’ll see: Expect to capture various wildlife on the camera, including coyotes, raccoons, mice, rats, crows, squirrels, dogs, cats, and lots of other animals. Review the footage or pictures carefully for any signs of your missing cat.
Using wildlife cameras to find a missing cat can be just what you need to improve your search efforts. By scouting the area, planning your search strategy, and correctly setting up the trail cameras, you significantly increase the likelihood of catching and reuniting with your beloved feline friend. You can improve the odds of bringing your missing cat safely home with determination, patience, and the right tools.


